Deploying an easy, personal, and custom Discord bot without coding
There are tons of public Discord bots out there. They're great, but their icons and names are usually branded. Maybe you want to have a Discord bot that is specific to your own server or brand. You likely want a custom Discord bot profile picture and custom name. Well, I've coded a full featured and easily deployable Discord bot to suit those needs. All you need to do is download it and change some settings to personalize it. Here's how you can set up your own personal Discord bot without needing an expensive cloud server. You can do this straight from your personal Windows, Mac, or Ubuntu computer. Of course, you can easily deploy this to a cloud server for 24/7 operation.
I'll be guiding you using Windows 10, but the differences should be minor enough to follow along on Mac or Linux.
Downloading the source code
Download the latest release as found here
 2JJ1
2JJ1
Right click the file and select uncompress/unzip/extract. Extract it anywhere you would like the project to be. I usually extract to the desktop path. It should then be a plain folder with the source code.
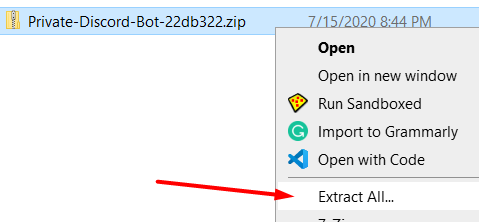
Windows 10 comes with a .zip extractor by default, but if using an older version of Windows, you may need to install 7zip in order to extract the source code.
Downloading Node.js
The bot was coded entirely in Javascript. To run the Javascript code, you'll need Node.js. Download the latest stable version of Node.js here. By downloading Node.js, you'll also be downloading the NPM cli which will be necessary later.
Downloading the latest stable version(LTS) as found here and install it:
Retrieve the project's file path
Navigate to the extracted source code folder file path. To determine the file path, open the folder. This should open up the file explorer. Toward the top, you should see a text input to the left of the search bar. Click it, and copy the text. It could look something like "C:\Users\username\Downloads\Private-Discord-Bot-22db322"
Downloading the project dependencies
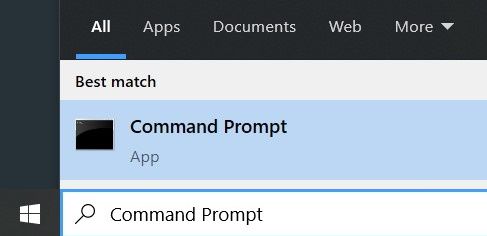
Now that you have Node.js installed, you can install the project's dependencies. When installing Node.js, it should've also installed the NPM command line interface on the side. You can utilize it through your operating system's terminal/CLI. Open the CLI. If you're on Windows, launch the command prompt. Press the Windows key -> Type "Command Prompt" -> Double click the first result to launch it.
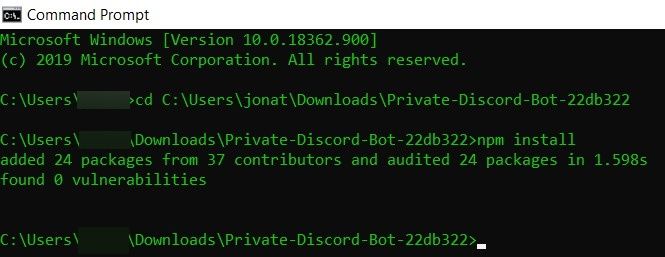
Using the newly opened CLI, you will need to navigate to the project file path determined earlier. Simply run the command:
cd C:\Users\username\Downloads\Private-Discord-Bot-22db322Replace the file path with the one you retrieved earlier.
You can then download and install the project's dependencies by running the command:
npm installWait for NPM to finish installing all of the packages.
Creating an application and bot with Discord
You'll need to create a profile for your bot. Though you don't go the same route as creating a normal user account. Go to this link while logged into Discord. Click the "New Application" button at the top right. Name it anything then submit. You should then be taken to your application settings. Navigate to the "Bot" tab on the side menu. Change the username to be whatever you want your bot to be named. Change the icon to be whatever you want your bot's profile picture to be. Make sure the "public" toggle is off. Currently, the bot is only designed for use in one server.
You should see a small "token" header on the bot settings page. Directly under is a button that says "copy". You will need to click the copy button later, so keep the page open.
Adding the bot to your server
Remaining on your application settings page, navigate to the "OAuth2" tab on the side menu. Under "scopes", click on the "bot" checkbox. A link should be generated in a text field directly under. To the right, there is a copy button. Click it, then open the link in your browser. This will prompt the invite process. Invite it to the server which you desire to use the bot. Turn on the administrator permission in the process. Remember you should only invite the bot to one guild.
Determining your server/guild id
Open and login to your Discord account. Open your user settings by click the gear icon near the bottom left. Under "App Settings" in the side menu, click on "Appearance". Scroll down to "Advanced". Turn on "Developer Mode" and save/close. Now when right clicking on a server logo, you should have a "Copy ID" option at the bottom of the selection menu. You will need the id of your desired server for later.
Configuring the environment
Inside of the project source code folder, create a new file called ".env". Edit it with your text editor and paste the following content in:
NODE_ENV=production
BOT_TOKEN=
guildID=
Go back to your bot settings page and click the copy button. This will copy the bot token. Directly after the BOT_TOKEN= text in the .env file, paste your bot token.
Directly after the guildID= text in the .env file, paste in your server's ID.
Configuring the bot settings
Inside of the project's source code folder, you should see a file called "settings.default.js". Copy and paste the file into the same folder, but rename the near copy to "settings.js". Open up "settings.js" with your text editor. You should see a bunch of settings you can turn on and off. By default, almost everything is turned off. You will need to turn on whatever you want. Read the comments to get an understanding of what does what. "true" means on, "false" means off for the most part. Again, read the comments in the file to get an understanding.
For example, to turn on message logs, change the following from
//true - Deleted & edited messages are logged to a text channel called #logs
logMessages: false,
to
//true - Deleted & edited messages are logged to a text channel called #logs
logMessages: true,
Starting the bot
Starting up the bot is very easy. Reopen up your CLI and make sure you're navigated into the project's file path. Simply run the command:
node index.jsThe bot should then be live and working. Assuming you followed this correctly and invited the bot to your server earlier, you will see output in the console along the lines of, "Active in 1 server".
Keep the CLI open for as long as you want the bot to run. Look into something called "PM2" if you want the bot to run without the CLI being opened and automatically start the bot when turning on your computer. This is particularly useful when using the bot on a 24/7 running cloud server/computer.
Conclusion
You know have a personal bot running. If you know how to code Javascript, try modifying the source code to make it even more personal! Configure settings.js to make it more personal for your server. Like the welcome message and desired moderator commands.